Simple T Pattern
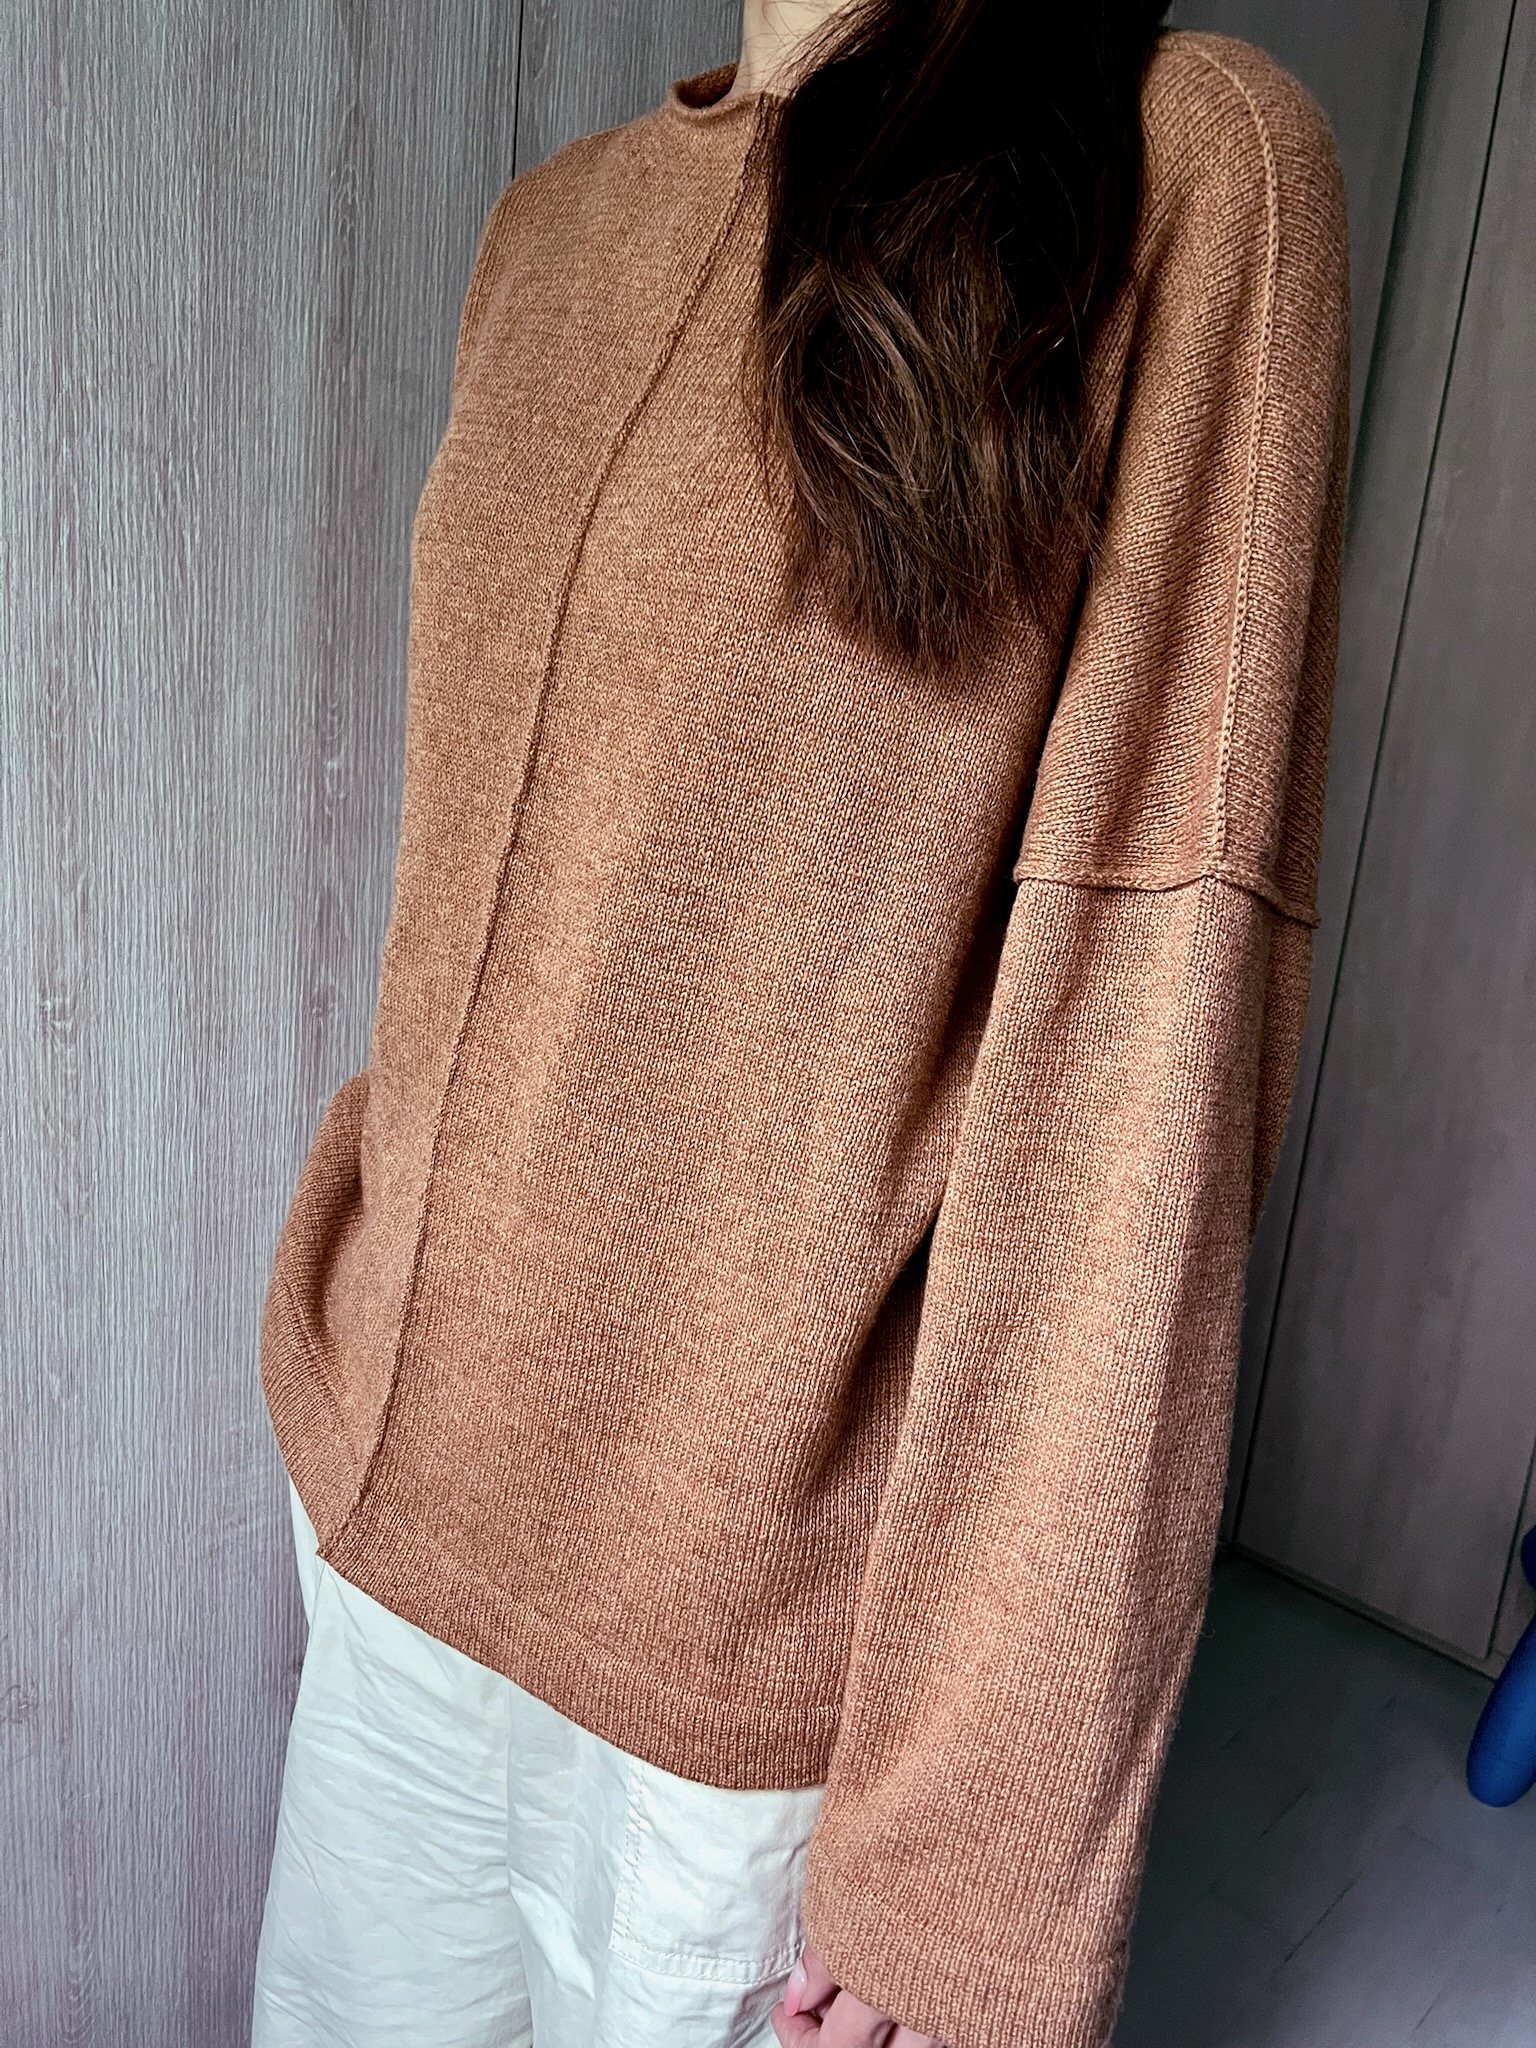
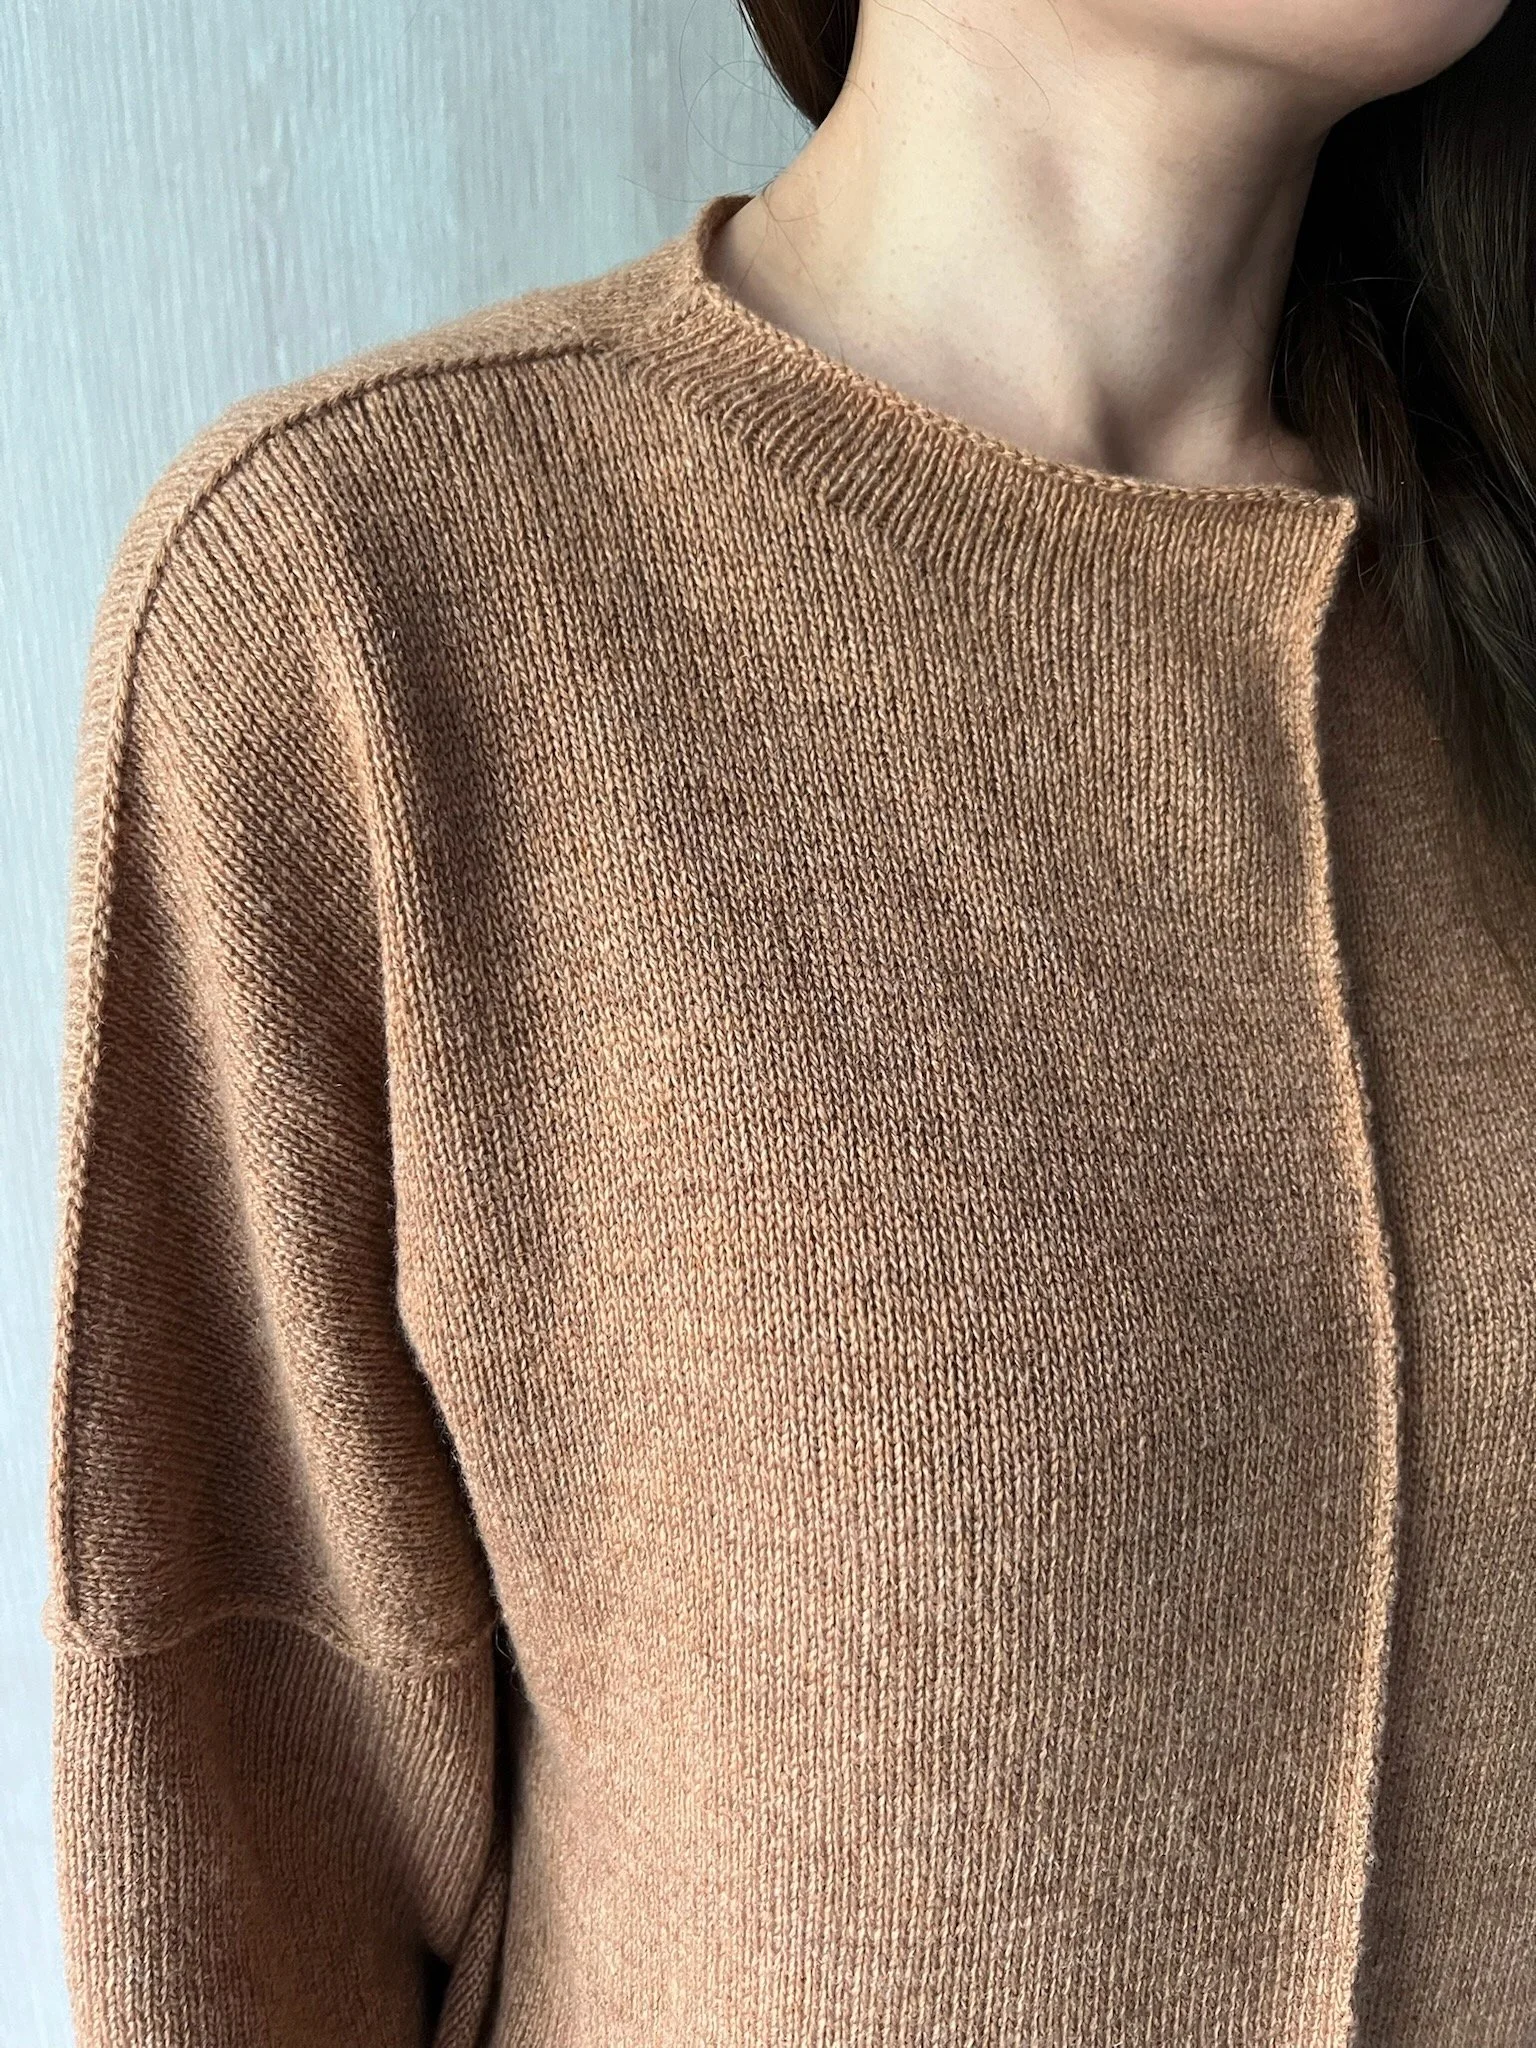
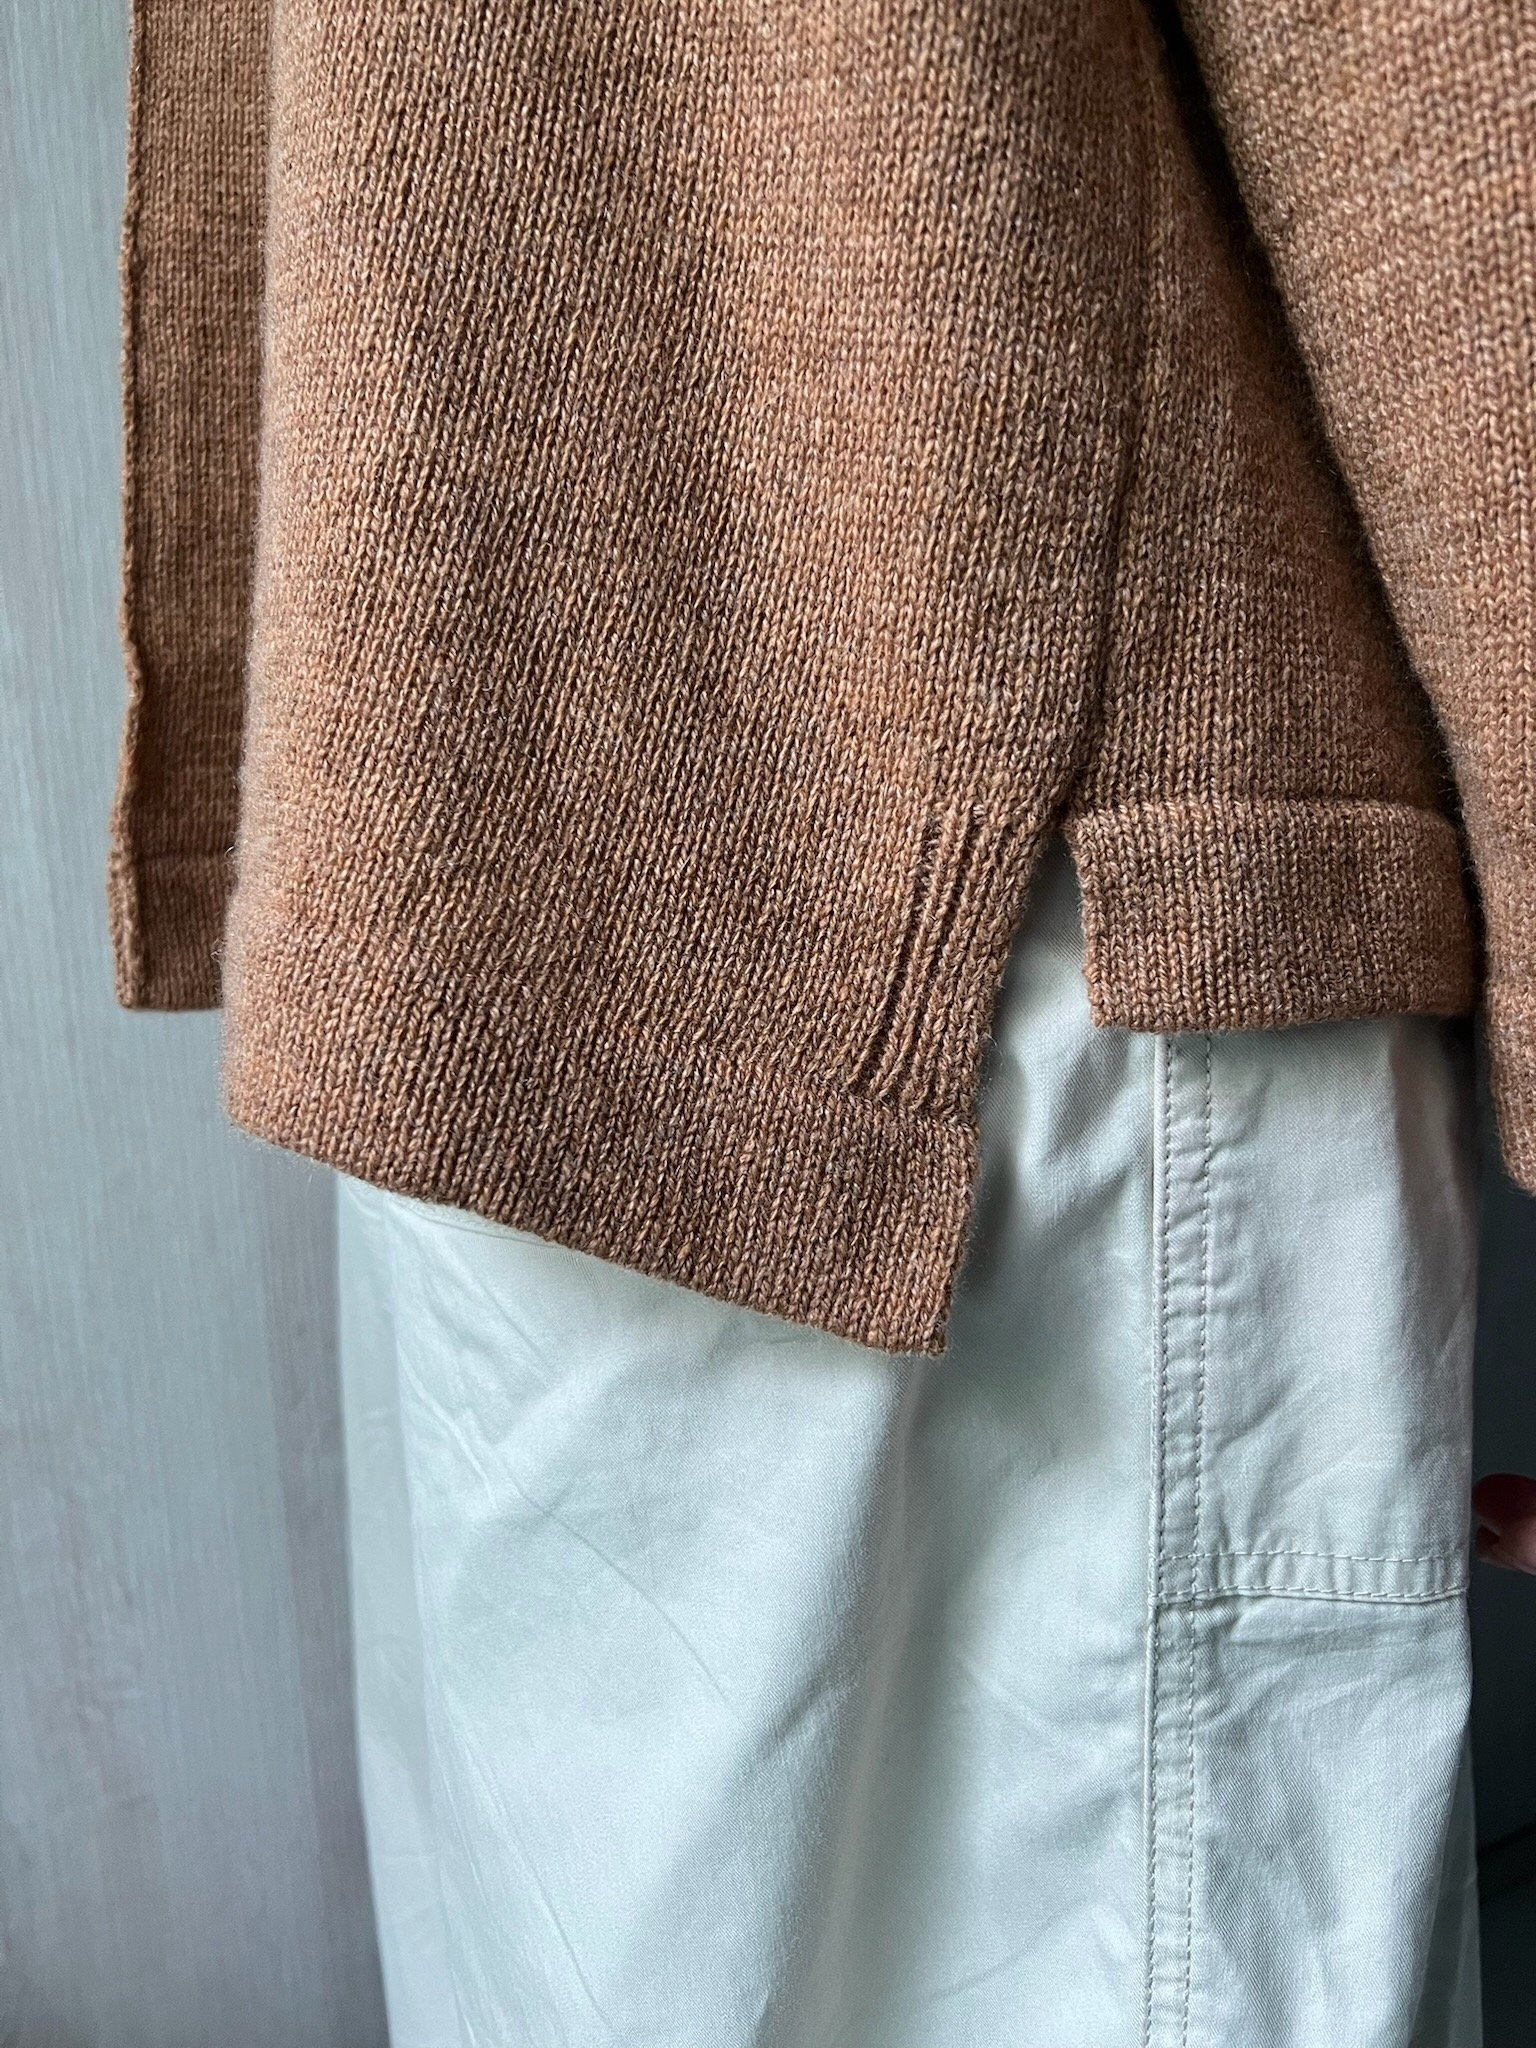
Digital DownloadThe Simple T features a relaxed and modern silhouette, that incorporates a combination of techniques such as turned hem, roll neck, and reformed rib. There will be some simple shaping and short rows, and the garment can be assembled using a linker, rehung on the machine or hand sewn.
The pattern comes with two sizes – S/M (half chest 24”), and L/XL (half chest 28”). This garment is knitted entirely on the main bed of a standard gauge machine.
$12
FAQs
-
A fully functioning knitting machine. Main bed only, standard gauge.
Basic accessories including transfer tools, cast-on combs, weights etc.
Waste yarn.
-
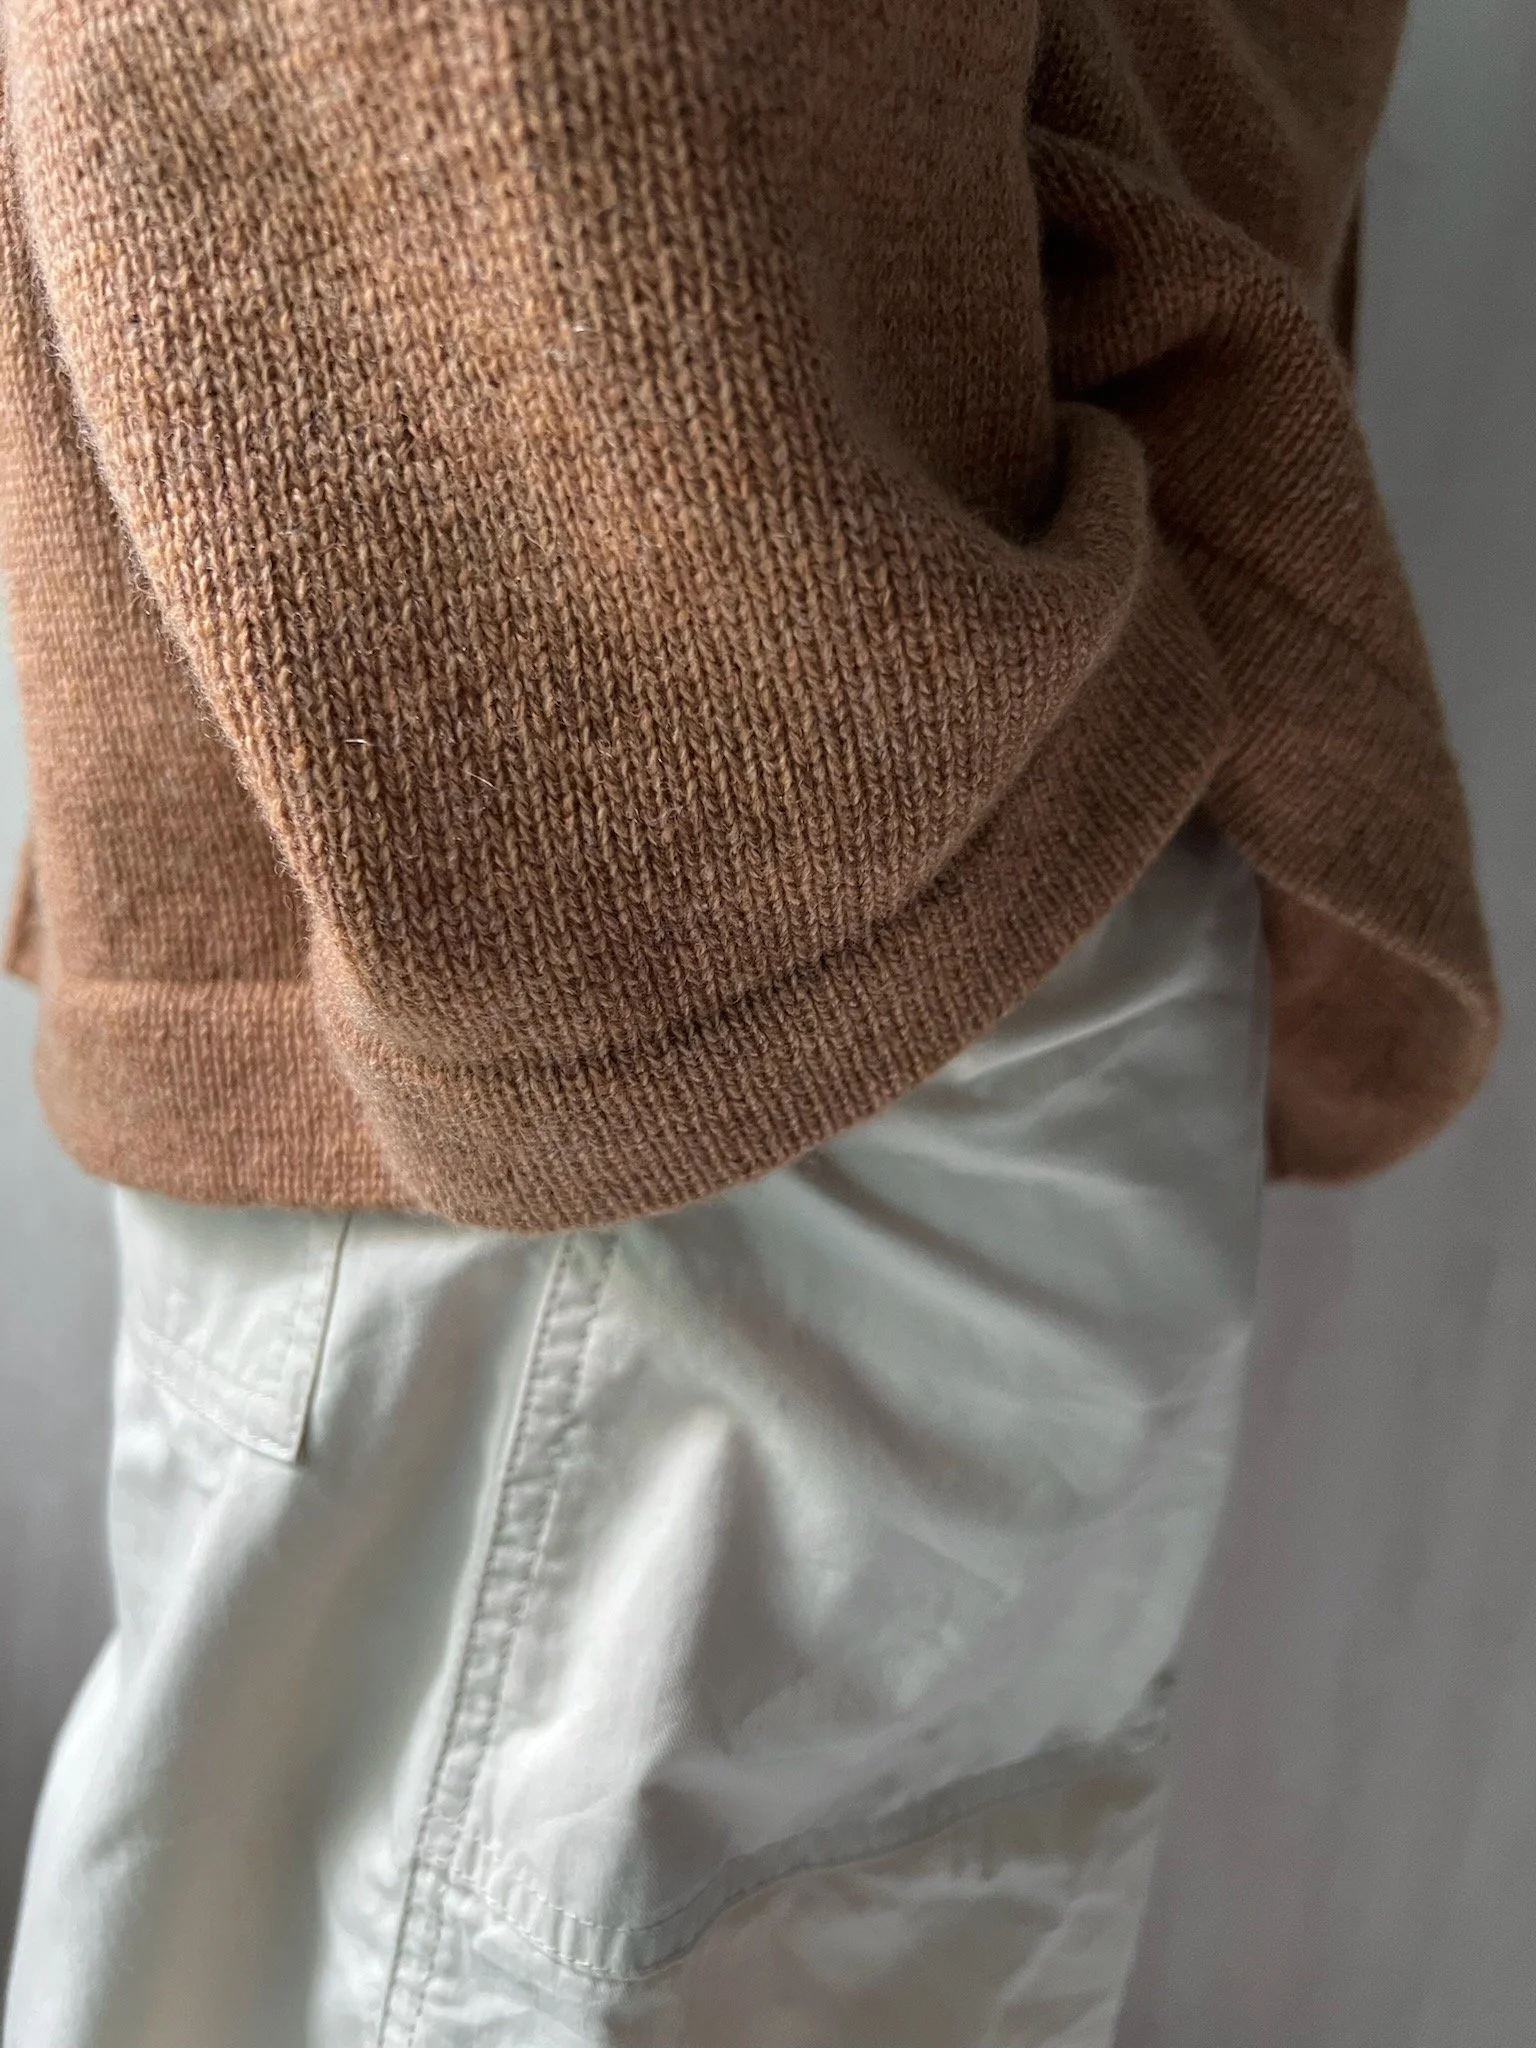
The Simple T is a classic T-shape oversized fit with a dropped shoulder.
The pattern comes with 2 sizes – S/M, and L/XL. The sample is a S/M. Check the schematic for detailed measurements.
-
The pattern is designed for the standard gauge machine, and the sample was a S/M, knitted with 2 ends of 2/28 cashmere.
How to Knit the Simple T
On-Demand ClassThis pattern is a great project for students who are new to knitting a whole garment, but there are techniques that may be tricky if this is your first garment. In case you need help with the techniques to complete the project, we have you covered
The class has the project broken down into four chapters, with assignments, and relevant videos that demonstrate the required techniques to finish that chapter.
You can take the class at your own pace, or make it a weekly practice, however works for you. You will be able to return to the class anytime to refresh, or come back to where you left off when you are ready to knit.
You will also have access to our forum to post questions, and see fellow knitters’ adaptation to the pattern.
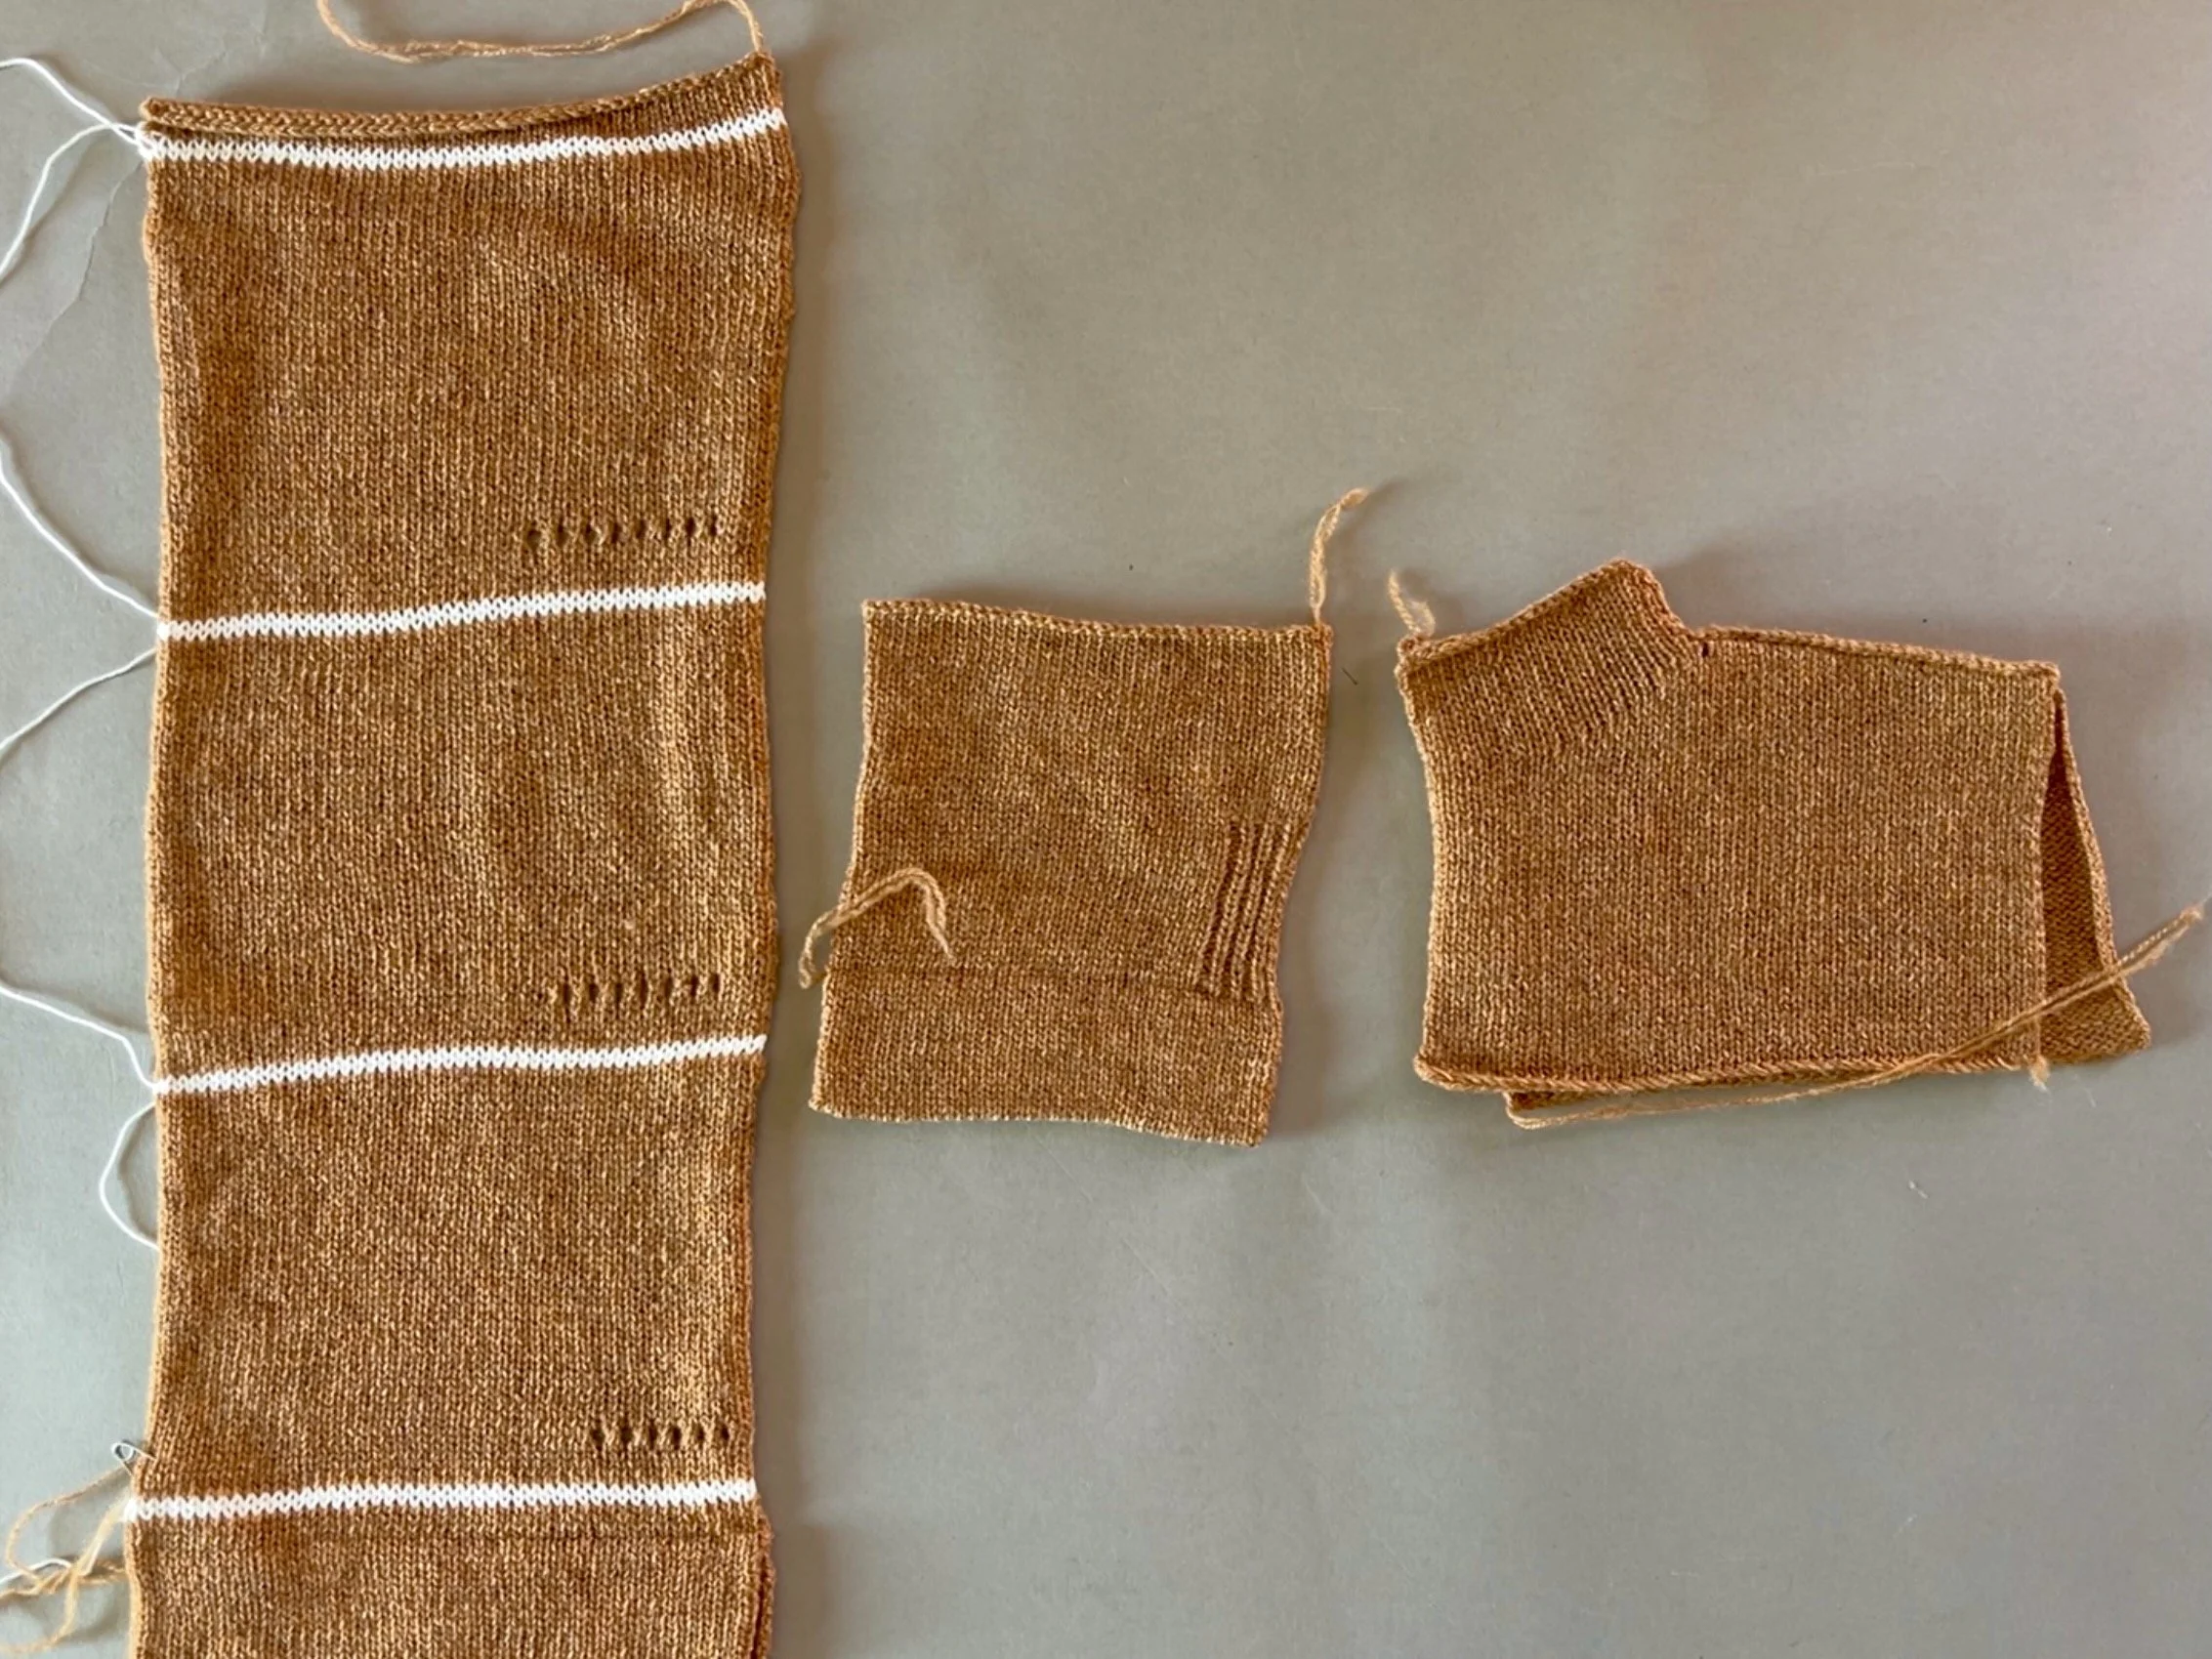
Chapter 1 – Tension Swatch & Practice
Using the yarn of your choice, we will be making a tension swatches to match the gauge. If you are new to making a tension swatch, check out the videos included in this chapter.
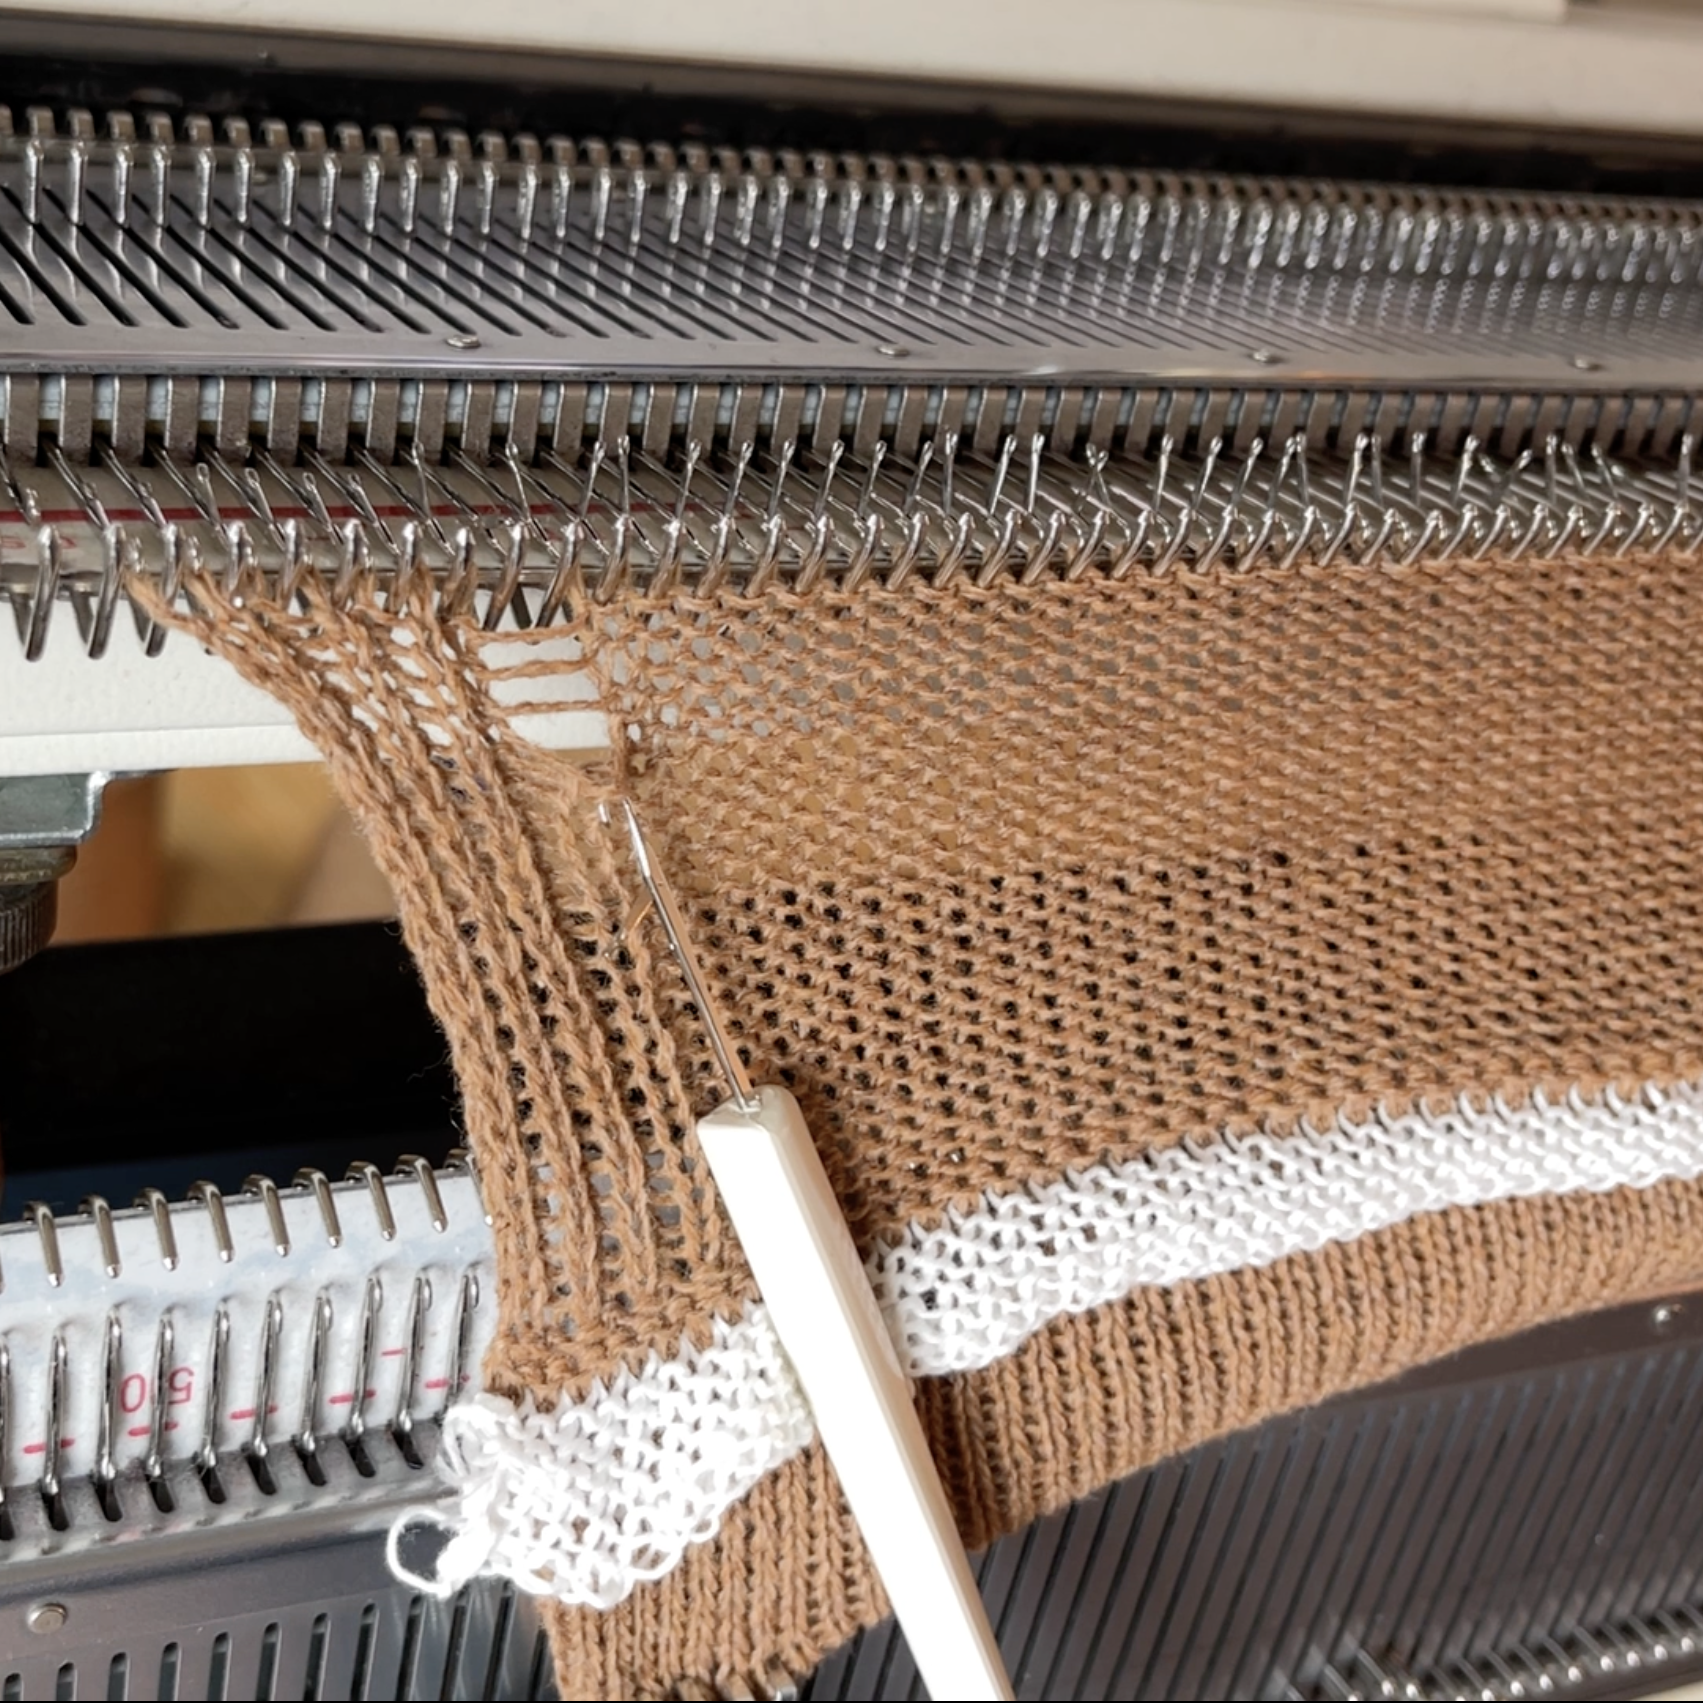
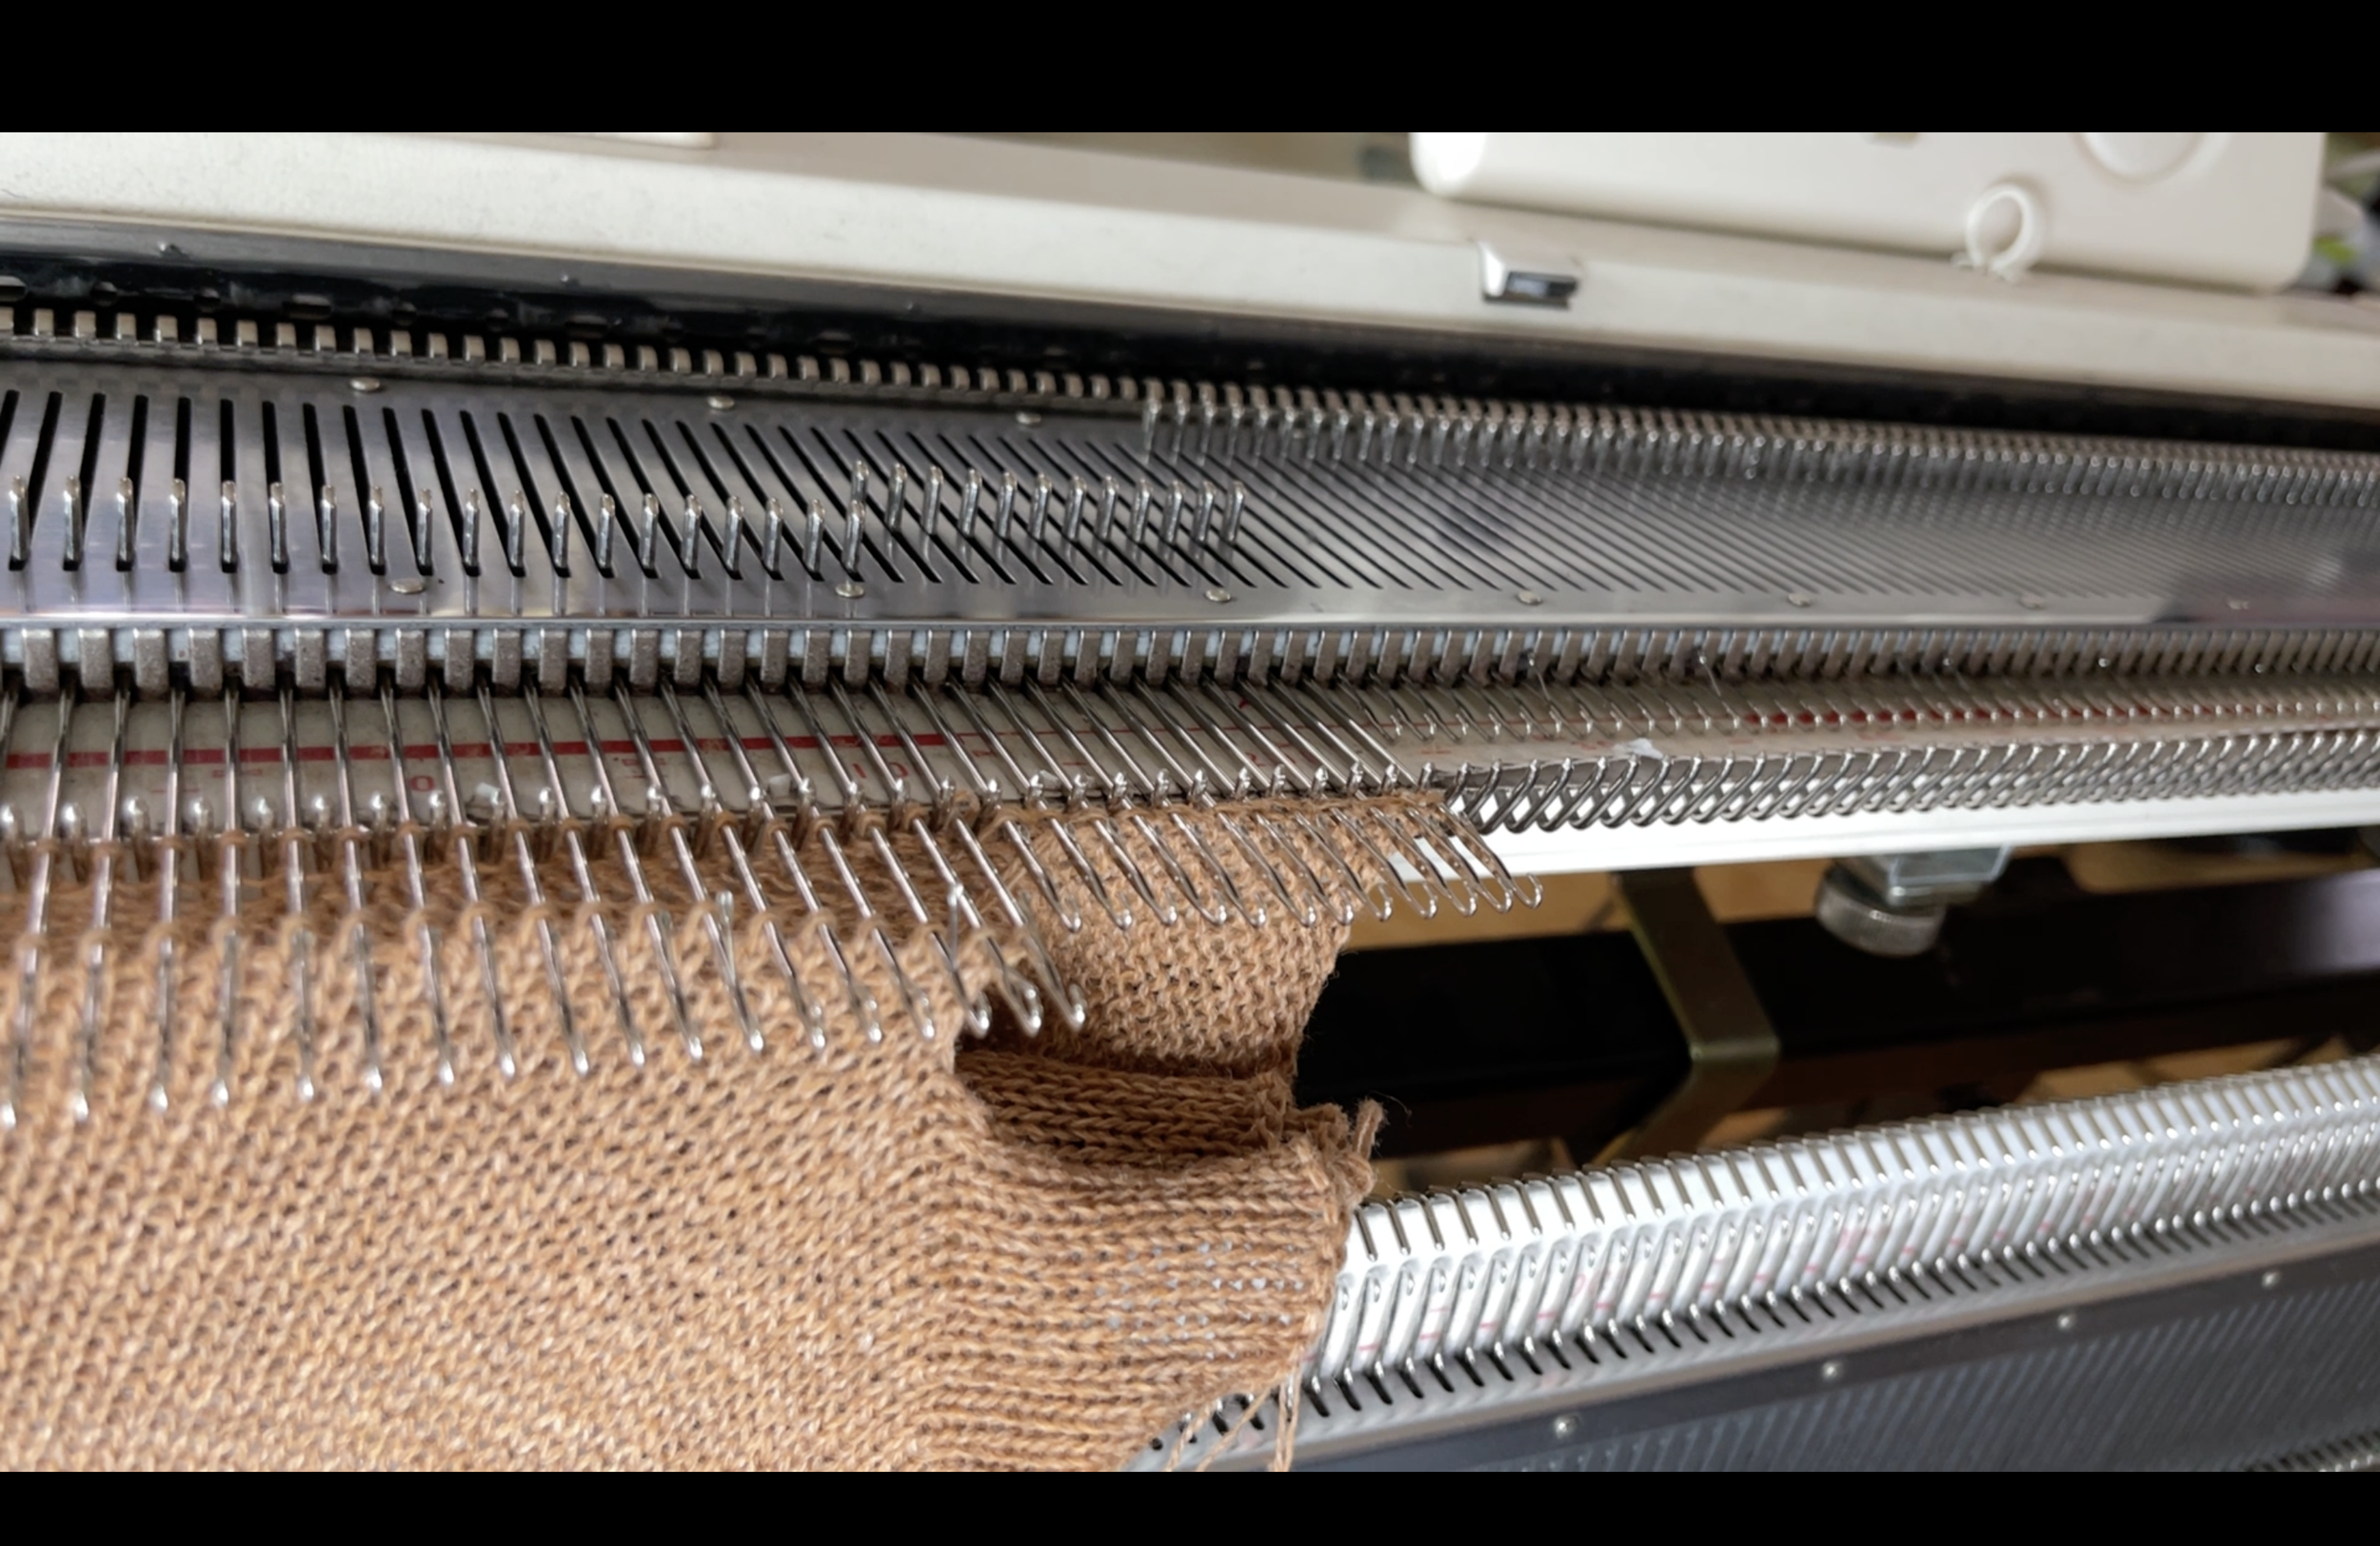
The project features reformed stitches at the side split, and a combined shoulder and neck shaping. We recommend you spend the time to practice these techniques individually with small swatches before diving into making the whole garment.
Chapter 2 – Sleeves & Front Panels
We are going to start the project with the sleeves and the front panels.
All of these pieces begin with a turned hem, if you haven’t done that before, be sure to watch the video, and try it out on a small swatch.
Chapter 3 – Back Panels
After knitting the first back panel (and while the piece still hangs on the machine), we will rehang and complete the corresponding front shoulder and neck, and do a combined bind off to connect the two panels.
Chapter 4 – Assembly
Now we have all the pieces ready, let’s pick a method you preferred to join the pieces – hand-sew, rehanging on the machine, or use a linker. We will demonstrate the rehanging technique in the video.